Custom widgets using PyQt
| Revision: | 1.0 |
|---|---|
| Date: | March 27, 2004 |
Introduction
Everyone who has programmed applications knows that sometimes you create a gadget that can be reused in other situations, and that code reuse is good.
In the specific case of GUI applications, often what you would want to reuse is a widget.
For example, you took one of the toolkit's widgets and extended its functionality in a way you think has wide application, and you intend to reuse it on future work.
So, what we will try to do is figure out how we can create easy-to-reuse custom widgets using PyQt.
Our example custom widget will be a RestructuredText editor. Why? Because I need one ;-)
What you need to follow the tutorial
- PyQt version 3.10 or later (older ones probably OK, too, just untested by me)
- docutils
Step I: Drawing the thing
We can use Qt's desiger to draw the layout of our widget, if it needs more than one component.
In this case, I will create a tabbed widget containing a editing (QTextEdit) and a viewing (QTextBrowser) widgets.
- Open designer.
- Tell it you want to create a widget.
- It will create an empty form, called Form1, nothing very exciting ;-)
- Now layout the stuff just the way I want it. The tabbed widget is called tabs, the QTextEdit is called editor, and the QTextBrowser is called viewer.
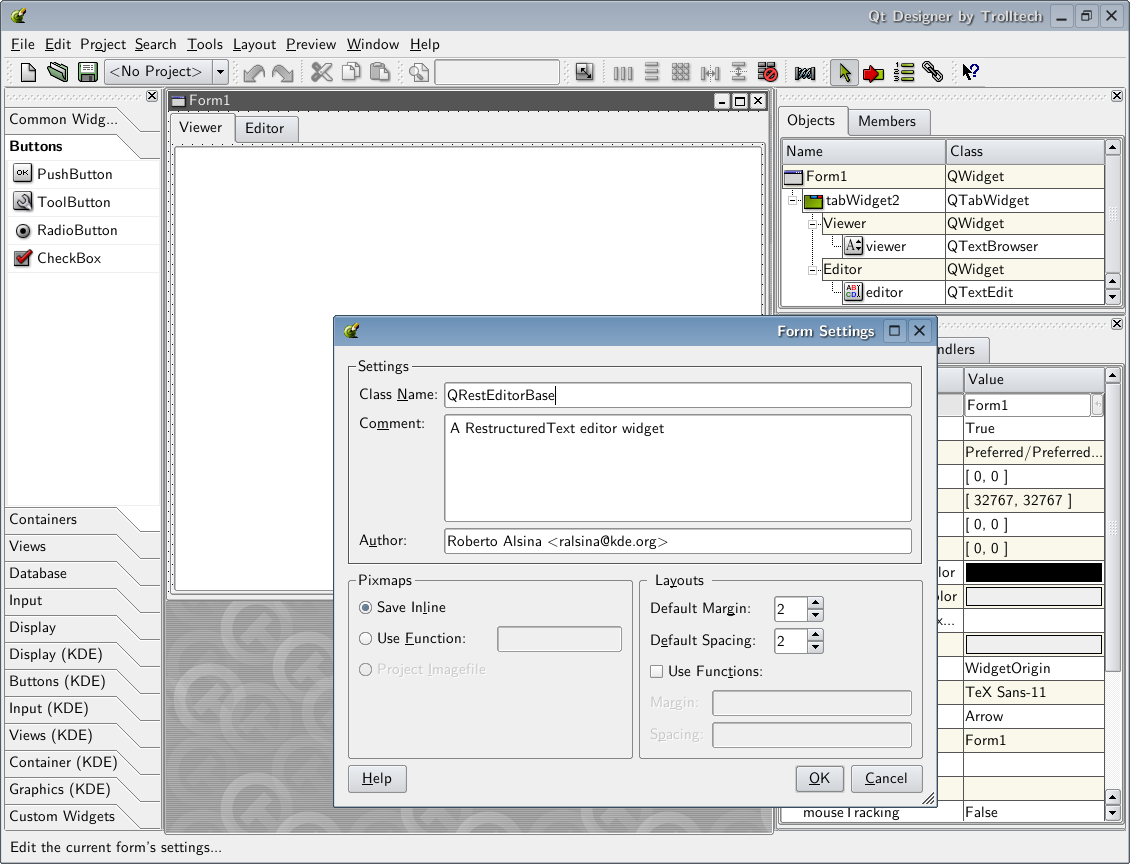
- Right-click on the form, and choose Form Settings
- Class Name: I choose QRestEditorBase This is the name of the generated class.
- Comment: Describe your class
- Author: You
- You can see this in the qresteditorbase.ui file
Step II: Slots
A Qt Widget has a number of slots, which is how the code accesses its functionality.
While the real QRestEditor is a rather complex widget, I will explain just a small part of it, so you can see how the general case is. Repeat as needed ;-)
You can create the slots from designer, by right-clicking on the form and choosing Slots.
Well, create all the slots you need. I only created one, called render(), which will use the docutils module to render the text in the editor into HTML on the viewer.
Step III: Implementation
While the look of the widget is already done, it needs to be fleshed by adding code to it.
My preferred way to do it is creating a subclass of QRestEditorBase, called QRestEditor, and implement there the desired functionality.
- First compile qresteditorbase.ui using pyuic:
pyuic -p0 -x qresteditorbase.ui > qresteditorbase.py
This will generate a qresteditorbase.py file which implements the QRestEditorBase class.
You can see if it works by doing
python qresteditorbase.py
Now here's how the QRestEditor class looks like:
from qt import *
from qresteditorbase import QRestEditorBase
from docutils import core
class QRestEditor (QRestEditorBase):
def __init__(self,parent= None,name = None,fl = 0):
QRestEditorBase.__init__(self,parent,name,fl)
def render(self):
self.viewer.setText(core.publish_string(str(self.editor.text()),
writer_name='html',
settings_overrides={'input_encoding': 'utf8'}))
if __name__ == "__main__":
a = QApplication(sys.argv)
QObject.connect(a,SIGNAL("lastWindowClosed()"),a,SLOT("quit()"))
w = QRestEditor()
a.setMainWidget(w)
w.show()
a.exec_loop()
As you can see, it simply reimplements the render() slot.
Now you can just use the widget at will. Of course what we did so far is nothing unusual :-)
Step IV: Designer's Custom Widgets
Designer is a nice tool. That's why we used it in Step I, after all. Now, we'll see how we can make it so our new widget can be used in designer, too!
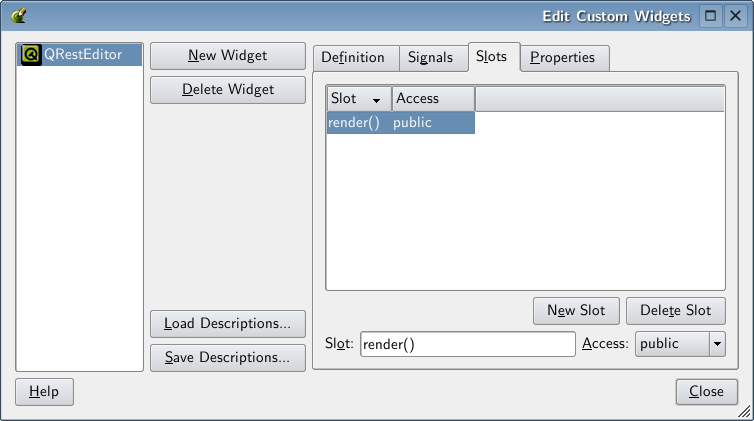
- Open designer.
- Go to Tools->Custom->Edit Custom Widgets
- Click on New Widget
- In the Definition tab:
- Class: QRestEditor
- Headerfile: blank
- In the Slots tab:
- Click New Slot
- Slot: render()
- You can replace the Qt logo with some picture so that later, when we use the widget, it looks somewhat WYSIWYG.
- Click Save Descriptions, and save it in an adequate file.
Step V: Using the custom widget in an application
Now, suppose we want to create a dialog containing the custom widget we created, for demostration purposes.
-
Open designer
-
Tell it you want to create a dialog
-
Tools->Custom->QRestEditor
-
Click anywhere so it gets created.
-
Now, you need to tell designer something, so that the generated code will import the right Python module to create a QRestEditor widget.
-
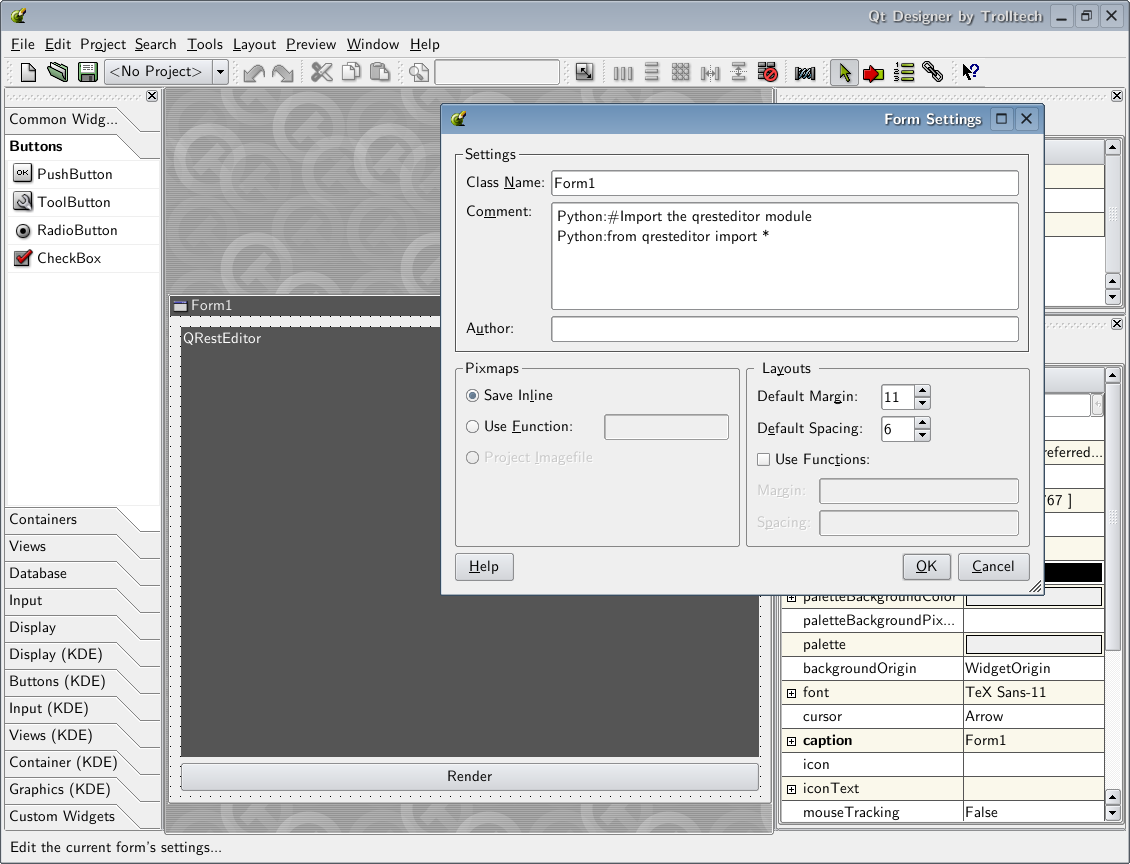
Right click on the form, and choose Form Settings
-
In the Comments field, add this:
Python:#Import the qresteditor module
Python:from qresteditor import *
Notice that there is no space after Python: because this will be inserted in the python code!
-
Add a QPushButton somewhere in the dialog.
Now, something that doesn't quite work yet:
- Connect, using Designer, the clicked() signal of the button to the render() slot in the QRestEditor, so that when you click it, it will trigger the rendering.
- Save the dialog to a file. I used testdialog.ui
- To test it, compile it using pyuic and run it:
pyuic -x -p0  testdialog.ui > testdialog.py

python testdialog.py
Sadly, on PyQt 3.10, the connections are not generated correctly, so this will not work right. :-P
On testdialog.py, you will need to change the line
self.connect(self.pushButton1,SIGNAL("clicked()"),self.restEditor1,SLOT("render()"))
to
self.connect(self.pushButton1,SIGNAL("clicked()"),self.restEditor1.render)
This means this is not yet perfect. But hopefully it ill get fixed soon, if possible :-)
However, if you handle all the connections to the custom widget by hand in a subclass of testdialog, it is entirely possible to use this already. That means you can't use designer 100%, but it's close.
Possible improvements
- If someone could manage to write a QWidgetPlugin that created arbitrary PyQt-based widgets, which could be used from C++, that would have two very nice effects:
- It would be possible to use such widgets WYSWIG from designer
- It would be possible to use them from any C++ Qt applications! (at least to some extent)
- Alternative: maybe it is possible to load the class we create, and then automagically generate a .cw file for it. The format of the .cw file is simple enough, and in PyQt every method is a slot, so it would be as simple as picking up a list of methods... that would make things quite a bit easier!
Packaging
There's really no need to package these things. You could just put them in a subfolder of your own project, and use them.
However, if you want to have a system-wide version of the custom widget, a simple distutils-based setup.py can do the work, and is left as exercise for the reader (post it as a comment, you get your grade later ;-)
Final Words
Of course to make a good Restructured Text editor widget, it needs lots more fleshing out than what you see here. In fact, I wrote this article in a more advanced version of the same thing ;-) The purpose was simply to show how you can create widgets maximizing the chance of reuse.
If any magazine or site editor reads this, feels this article has adequate quality, and wants to publish something I write... feel free to contact me and we'll talk about it. I'm not expensive, I have several ideas, and I write quickly ;-)
Comments for this story are here:
http://www.haloscan.com/com...
Hi very nice article