Hace unos días puse en twitter una foto de mi escritorio y me sorprendió
el interés que generó, ya que pensé que no tenía nada de especial salvo
que lo había limpiado :-)
Como al parecer terminó siendo interesante, acá va con algunas explicaciones.
Este es mi escritorio actual, que tiene una mejora con respecto al original, porque el teclado es mejor:
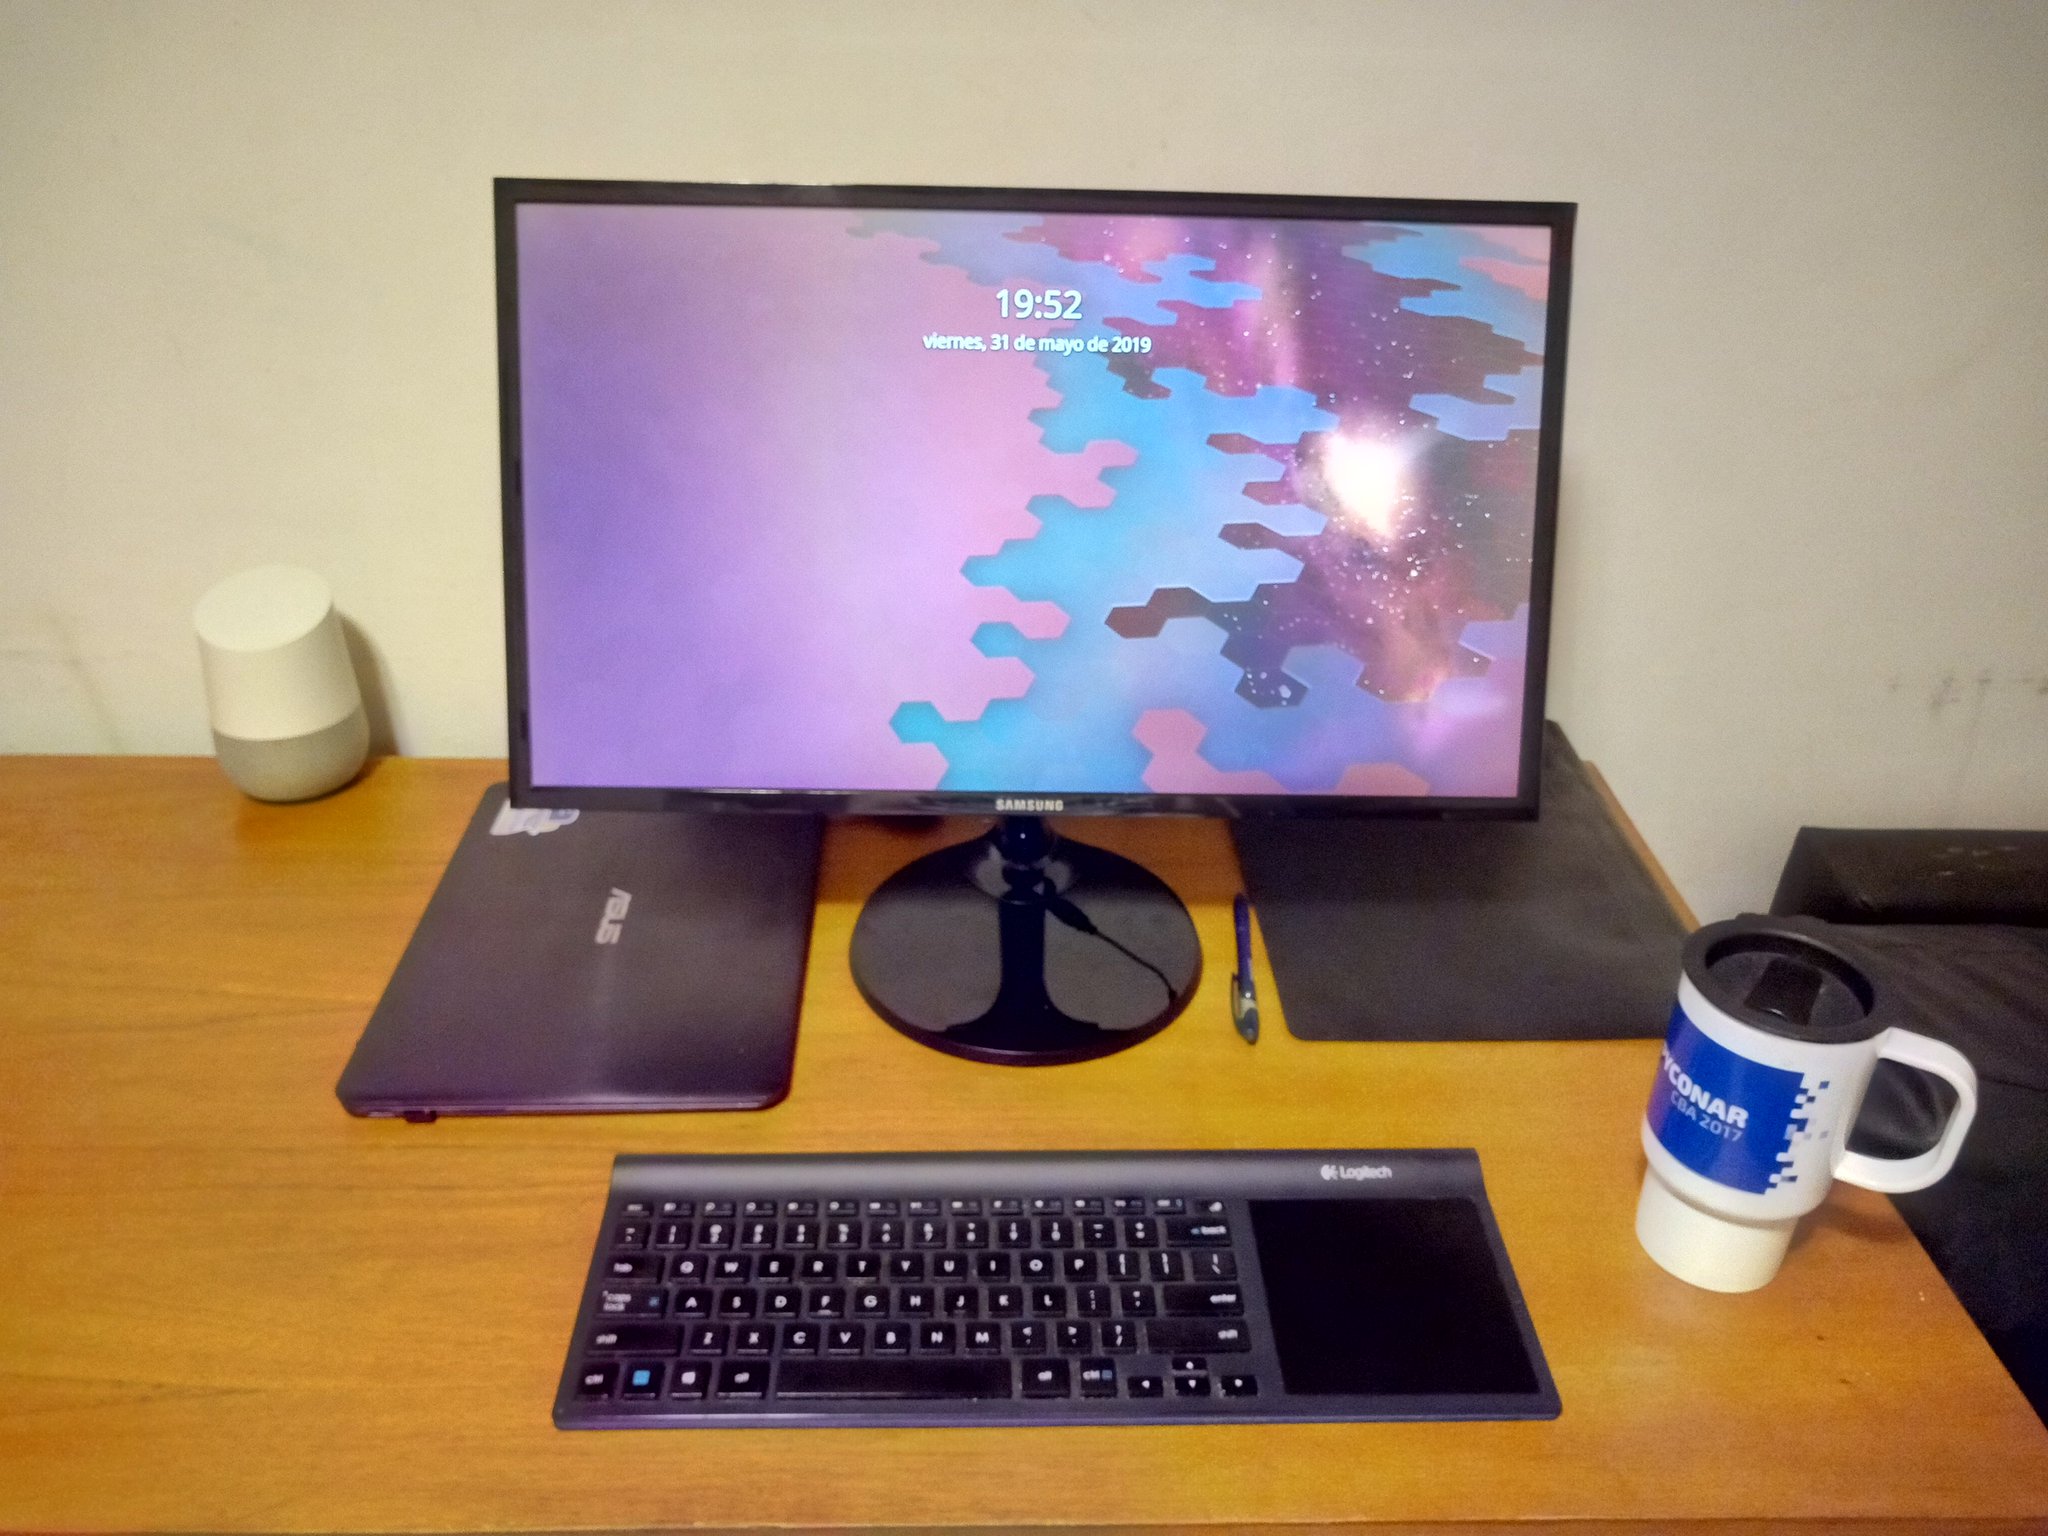
La idea es que un escritorio "limpio" me ayuda a concentrarme (en general funciona). Lo único que hay es:
- Teclado Logitech TK820
- Notebook ASUS Ux305f
- Monitor Samsung 1080p 27"
- Una birome (la parte de atras sirve para pantallas touch)
- Una carpeta negra
- Un jarro térmico de café de PyConAr 2017
- Un Google Home
y no se ven, pero tengo a mano unos auriculares que a veces quedan en el escritorio.
Cada una de esas cosas tiene un porqué, y si agregara una cosa más ... la barrera para entrar es bastante alta.
Teclado
En este momento tengo un Logitech TK820 que tiene un touchpad grande (11x11cm) al costado. Es un teclado "chicle" estilo notebook, pero las teclas tienen más travel (casi 1.5mm) y el touchpad es muy bueno. En general prefiero touchpad en vez de mouse por las muñecas,
y al estar al costado no lo toco mientras escribo, lo que es un plus.
Me gusta que sea wireless porque mantiene el escritorio libre de cables, y al ser RF no tiene lag como pasa con algunos BT viejos.
Lo compré en oferta en un viaje en ... 2014? Es un modelo de 2013, sigue andando perfecto! No lo estaba usando por uno de los defectos de este teclado: no tiene donde guardar el dongle de RF. Por suerte es un "unifying receiver" de Logitech y se consiguen repuestos.
Tengo encargado y viajando desde Laos un teclado mecánico que veremos si lo reemplaza, va a tener que hacer una audición.
Jarro de PyConAr
Tomo mucho café. Al ser un jarro térmico me ayuda a tomarlo más lento porque no se enfría tanto. Aparte es de PyConAr que es la mejor conferencia del mundo mundial :-)
Carpeta negra
Hay papeles que tengo que tener a mano. No quiero tener papeles en el escritorio. Me busqué la carpeta más parecida posible a mi notebook y la puse del otro lado del monitor para dar simetría.
La birome es para interfacear con los papeles.
Monitor
Cortesía de Thirstie mi actual empleador/cliente que tenía unos monitores al cuete en un coworking :-)
Hasta hace poco trabajaba exclusivamente con la pantalla de la notebook (es 13.3" 1080p) pero ... lamentablemente mis ojos ya no son lo que eran y se me estaba cansando la vista, así que simplemente cambié a un monitor con la misma resolución pero el cuádruple de superficie (27") y que tiene algunos extras como "eye saver" que te limita la luz azul (no sé si sirve para algo pero lo uso) y realmente se ve muy bien.
Tal vez en un futuro pase a un monitor 2k del mismo tamaño. Un monitor 4k es realmente un desperdicio, si ya casi no veo los pixeles del 1080p :)
Un upgrade planeado es poner un mejor pie o un brazo para permitir ajustar en altura o rotar la pantalla a "portrait" que es mejor para codear (extraño todavía mi notebook con pantalla 4:3, entraba TANTO código...)
Google Home
Tiene dos fines:
- Me gusta controlarlo por voz
- Funciona como parlante bluetooth!
Si bien el audio no es WOW suena sorprendentemente bien para ser así de chiquito.
Auriculares
Son unos Bluedio Turbine T4S que compré en oferta el año pasado (y con el dolar a $20!). Lo que me gusta de estos auriculares es:
- Bluetooth con soporte de dos dispositivos, así que funcionan con mi celular y mi notebook al mismo tiempo.
- Son over-ear así que aún con la cancelación de ruidos apagada para ahorrar batería aíslan bastante.
- A mí me quedan cómodos (hay gente a la que no)
- La batería dura fácil tres o cuatro días y carga al toque. Peor de los casos si no los puedo cargar en el momento hay un cable de audio.
- Son de metal, se sienten premium por así decir. Los uso hace un año mucho y recién ahora empiezan a tener algunos problemas muy menores (no "traba" uno de los lados, ni se nota)
- El audio es bueno.
Escritorio
Es un escritorio hecho a medida por Varillas lo que tal vez suene lujoso pero no lo es, sale más barato que el equivalente hecho de aglomerado en Easy.
Mide casi dos metros de largo, para dar dos puestos de trabajo (el mío y el de Rosario) con tres estantes en el medio lo que da lugar de almacenamiento discreto con unas cajas lindas y lugar para cableado.
Las patas son de varilla cuadrada de acero pintado de negro, la tapa de madera sólida de paraíso. Es básicamente indestructible a menos que lo deje en una laguna.
Cableado
En general tengo pocos cables por elegir accesorios inalámbricos.
La notebook y el monitor tienen cables de alimentación, y hay un cable HDMI entre ambos. Los organicé con un aparatito a tal efecto de goma y pesado para que los cables no se muevan:
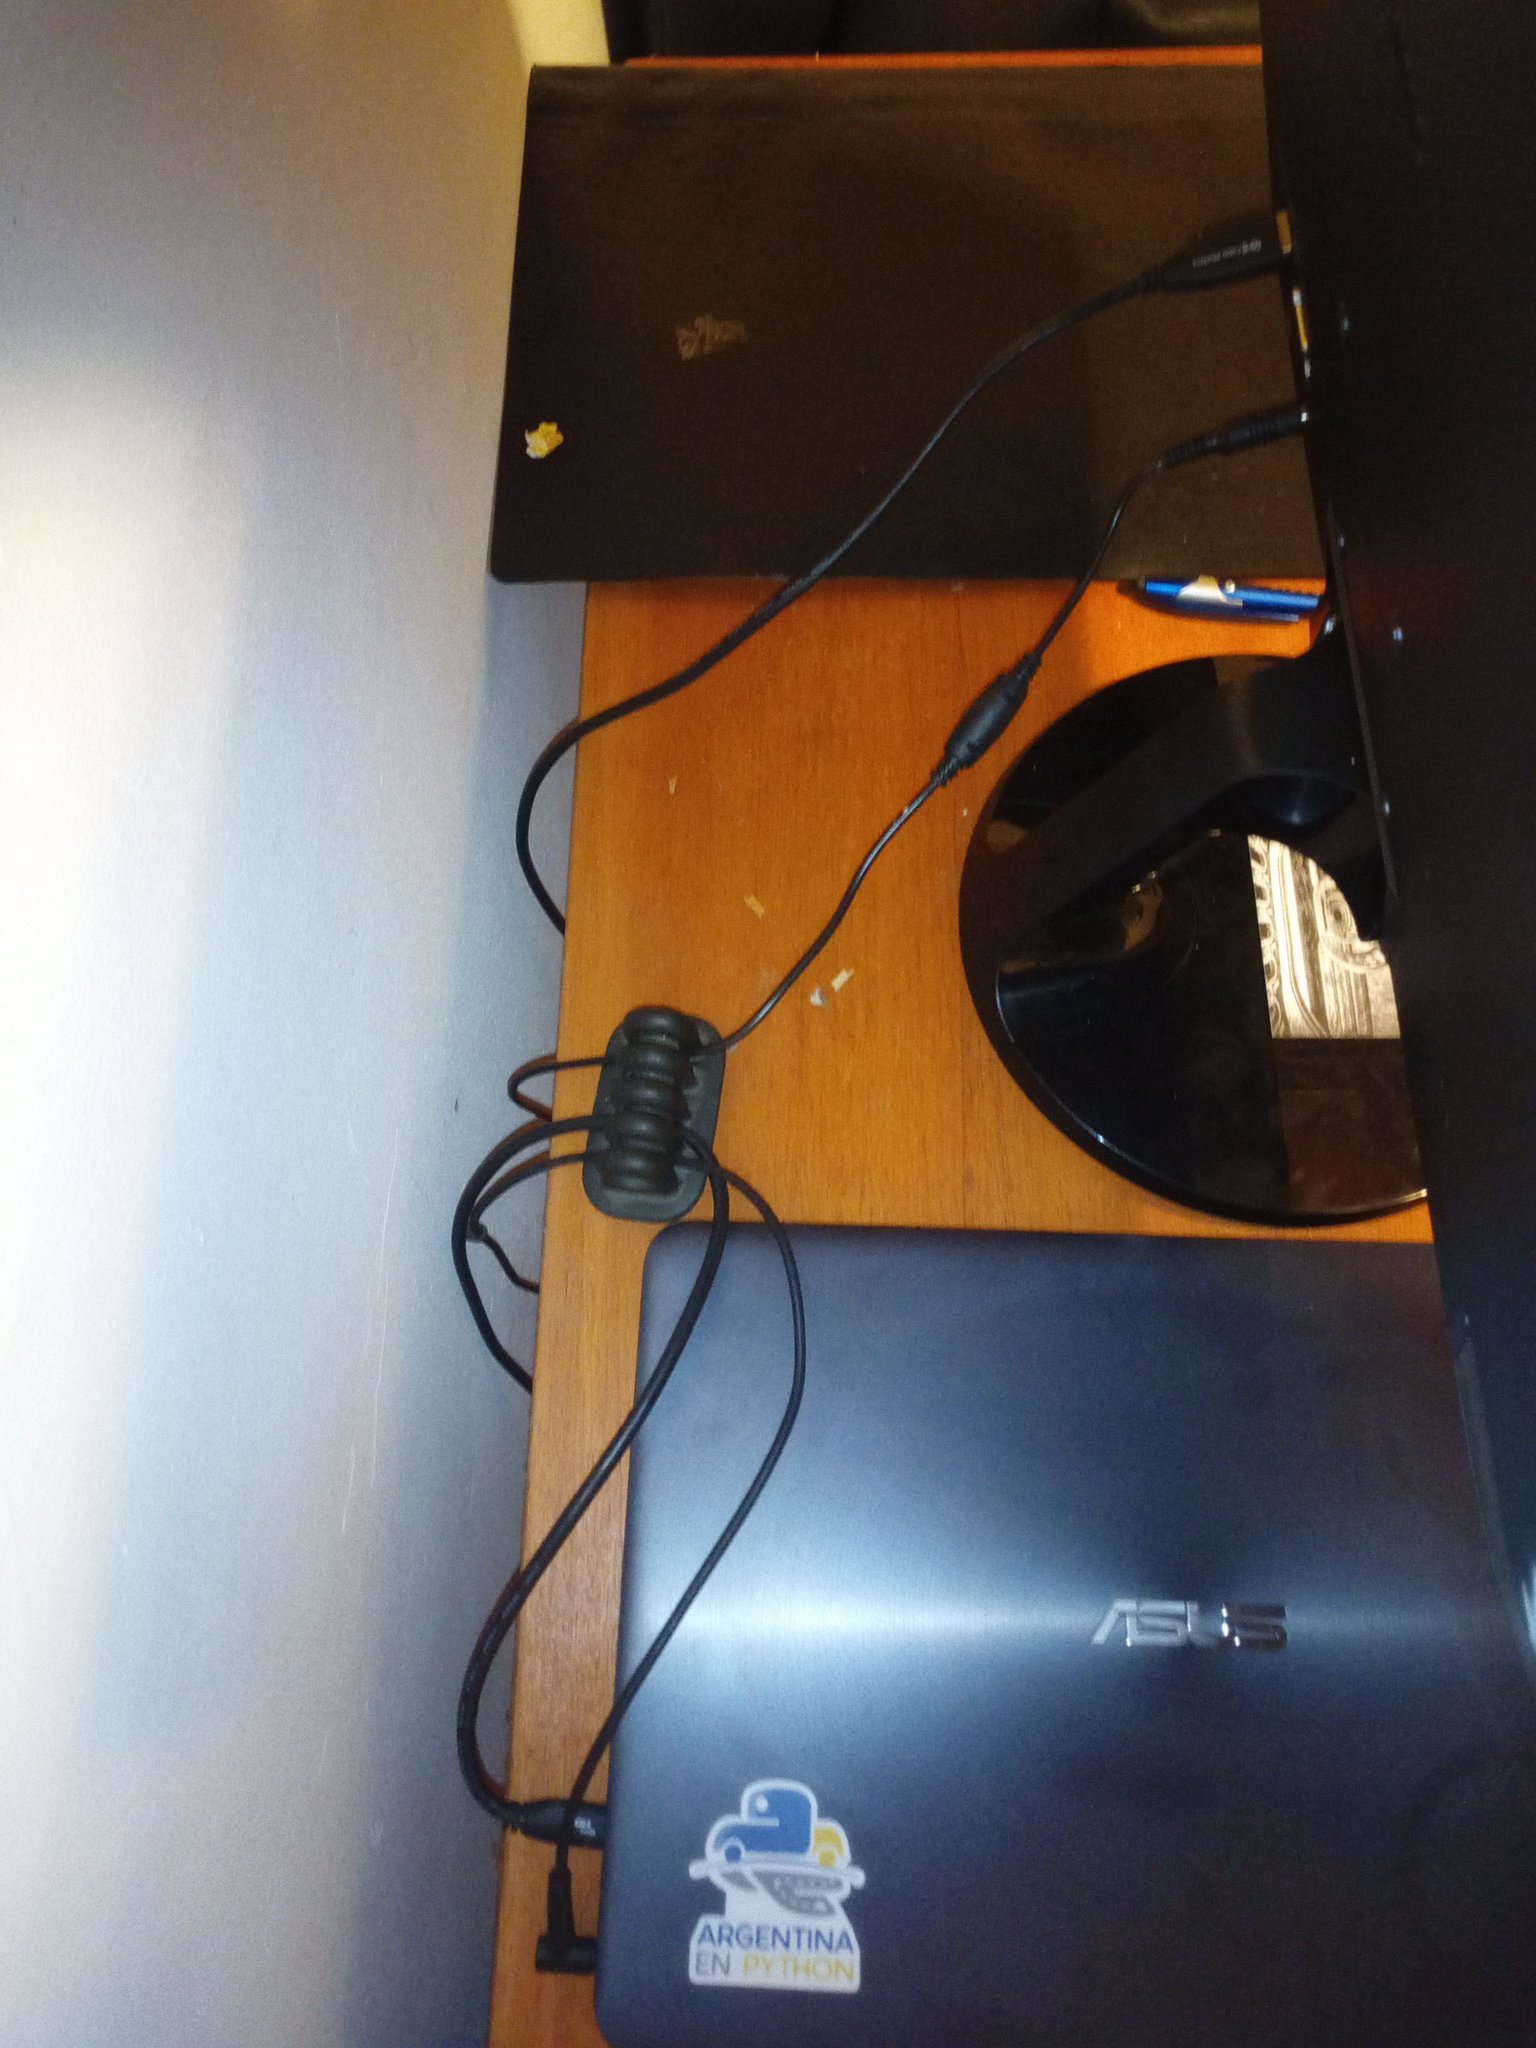
El Google Home también tiene un cable, pero va directo hacia abajo y no se ve.
Hay una parte que todavía no he acomodado, que es el bajo escritorio:

En algún momento juntaré ganas y usaré algo como esto para organizarlo.
Fuera de eso, tal vez un hub usb para no tener que tener dongles y cosas así en la notebook misma.
Notebook
Una Asus Zenbook UX305F
que compré por menos de 700 dólares hace como 4 años así que está sumamente amortizada.
La CPU es una Intel Core M-5Y10c dual core, 4 threads con 8GB de RAM y video lo que sea que viene con esto (Intel HD5300?) que es ... decididamente mediocre!
Sin embargo, sinceramente no recuerdo en los primeros tres años de tenerla haber dicho "esto es una carreta". Hoy en día ... sí, cuando levanto un sistema dockerizado con una cantidad de containers ... podría ser más rápida.
Así que estoy viendo de pasar a algo como una Asus Zenbook UX33FA que tiene 16GB de RAM, un SSD el doble de grande, una CPU mucho más rápida (es demasiado y hace que la notebook sea muy cara pero no encuentro CPUs mediocres con 16GB de RAM...)
Sí, ese modelo es muy caro así que pienso esperar un poco y comprarlo refurbished a menos plata (ahora está a 890 "como nueva")
Qué es lo bueno de mi notebook actual:
- La batería aún 4 años después todavía aguanta 4 horas. Aguantaba 7 cuando la compré. Pensando en renovarla, el reemplazo es sencillo y el repuesto sale 50 dólares.
- La pantalla es hermosa aún hoy.
- El teclado y el touchpad son razonables.
- El peso. Pesa 1.2kg y el cargador 300g. Ni se siente en la mochila.
Software
Hace un tiempo que estoy usando Namib Linux que lo podés pensar como "Arch para seres humanos". O sea, es Arch, pero con un instalador lindo y desktop por default (podés elegir cual querés).
Mi desktop por ahora es KDE 5.15 que me sorprendió por lo pulido. Voy probando cosas, Deepin y MATE son muy interesantes.
Cosas que no hay en el escritorio
Libreta
Para no tener una libreta en el escritorio tomo notas en QownNotes que es un balance muy copado entre potencia y sencillez.
Teléfono
Todas las aplicaciones de mensajería del celular están en Rambox con temas oscuros y no llaman la atención.
Para atender llamadas uso los auriculares. Para saber que suena el teléfono (y otras notificaciones) uso KDEConnect que hace cosas como mutear la música cuando suena una llamada y en general no necesite nunca mirar el celular.
Posibles Upgrades
Algunos ya los mencioné, pero los que tengo en mi cabeza son:
- Teclado mecánico y mouse "lindo"
- Brazo para monitor / soporte regulable
- Notebook más nueva
- Cactus?
