So I built a ... laptop?

Introduction
There is a vintage computer that has always fascinated me. It was one of the first practical portables, the Tandy Model 100.

It ran on a few AA batteries and had around 20 hours of battery life. Does your laptop do that? No.
It's iconic in multiple ways.
- That wide, stumpy screen!
- That pre-IBM-PC keyboard with the funky cursor keys which now looks like ... a almost normal 60%?
The Model 100 was an instant hit with journalists, who could use its integrated text editor to write on the road and its modem to send stories to the paper.
On the other hand that form factor just doesn't exist anymore. It didn't even survive long in further Tandy models, because newer better screens had a more "normal" aspect ratio and the now-standard clamshell made more sense.
But since I loved it... why not try to build something like it now, when we have much better technology? Well, I couldn't come up with any good reasons.
Except that I had no components that could work in it.
And that I had no idea how to design such a thing.
And that I knew nothing about anything like electronics, 3d modeling, etc.
So, I decided to do it. In late 2021. And I have spent the last 16 months or so working on it.
And the 2nd prototype actually works!
If the details of how it's done are interesting to you, I have good news. I am about to write down A LOT OF DETAILS.
Design Idea
Even though this is what some may call a cyberdeck I didn't want it to be cyberpunk, or steampunk, or any sort of punk.
I wanted to make it as smooth, polished, commercial-looking as I could within the constraints of my ability (which are plenty).
I wanted it to look as what may happen if portable screens never abandoned the 5:1 aspect ratio and clamshells didn't exist.
Did I succeed? Hell no. This is janky as hell because it's a handmade prototype, but it shows the seeds of possibility, of iteration that may make it ... possible.
Hardware
SBC
So, what is the engine for the thing? When I was thinking about how to make this functional, the obvious thing was to use a SBC, such as a Raspberry Pi.
OTOH I started the project in the middle of the pandemic shortage of SBCs, which is still sort of ongoing, so those were hard to get, and expensive.
So I turned to a lesser-known brand which had the magical thing: stock.

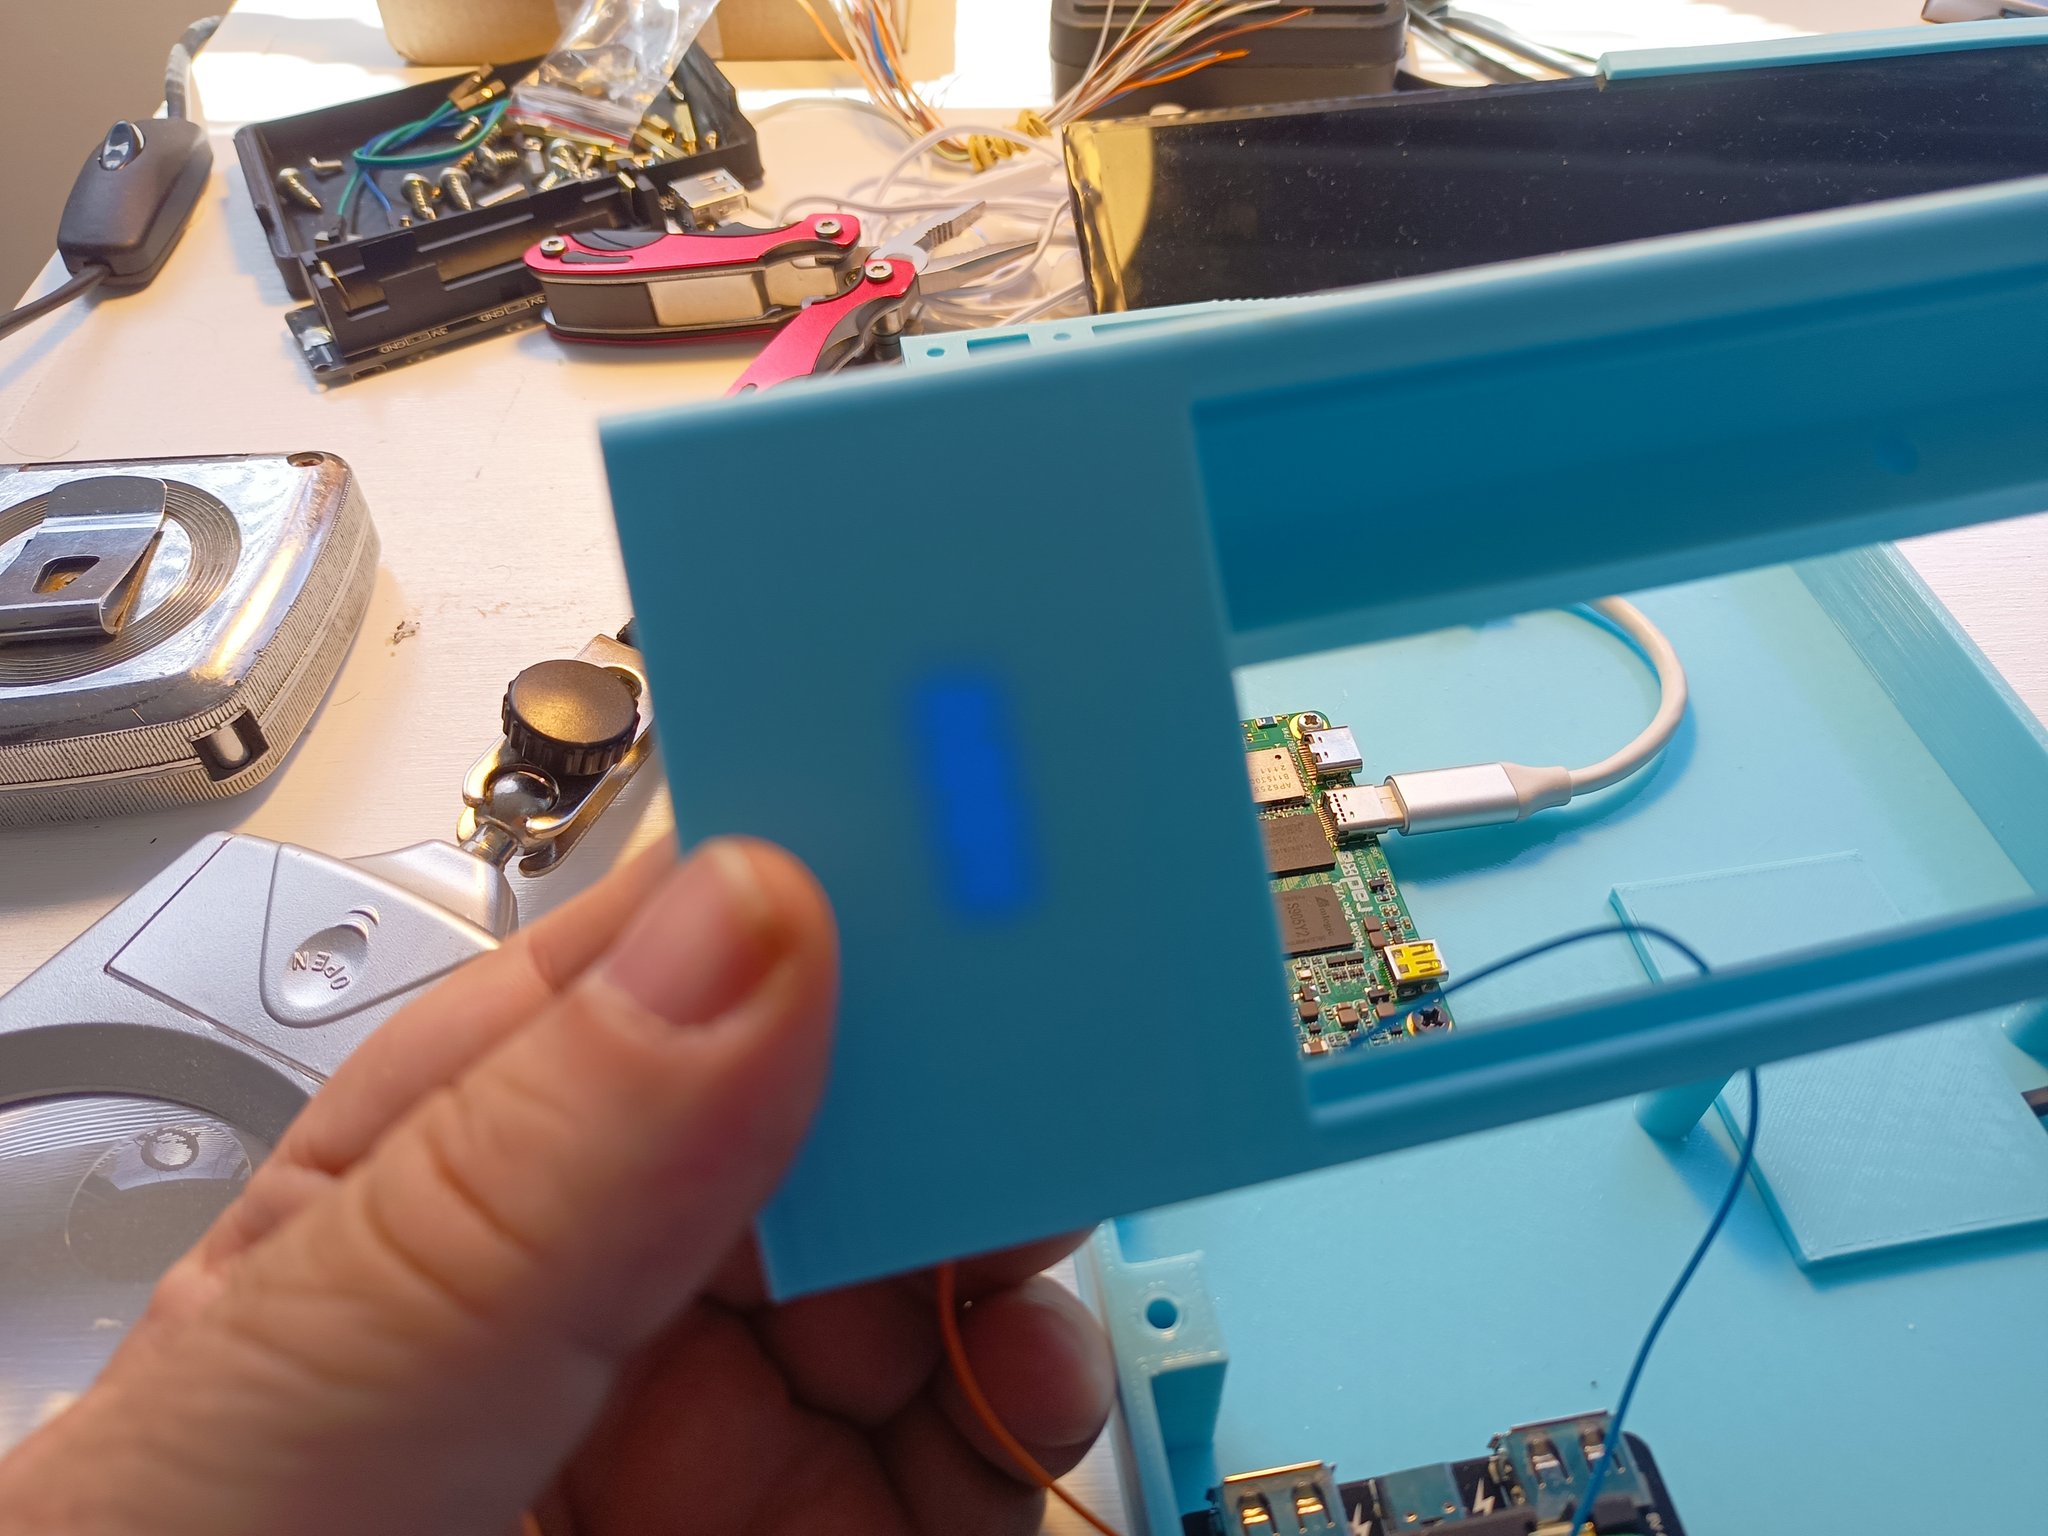
So, the SOC is a Radxa Zero, a tiny SBC in the same form factor as a Raspberry Pi Zero, except it's ridiculously more powerful:
- Quad core
- 4GB of RAM
- 32GB eMMC (no need for SD card)
- USB 3.0
- Micro HDMI port capable of 4k 60Hz
This is roughly 70% of the power of a Raspberry Pi 4, in a much smaller package that uses less than 5W of power.
Keyboard
From the beginning I wanted a mechanical keyboard. But I did not want to make my own because that's a lot of work. So, I created software (more on that below) to make it possible to just gut a cheap mechanical thing and adapt the case so it would work.
Just because I am not hardcore enough to live without cursor keys I decided on a 65% board and the main criteria was "ships to my house and is cheapest" so ... enter the "GANON 65%" costing under 20 dollars.

It's absolute garbage. The stabilizers are horrible, the switches are scratchy and inconsistently clicky yet loud, and it was perfect for the job because all keyboards in 80s computers were pretty crap.
Oh, and it's one of those janky rainbow fake-RGB backlit things.
All of these cheap keyboards I've seen are one or two circuit boards with through holes for screws. So I made the case with stands so they would snap in place and then be screwed in.
Power
The initial idea was to use a simple USB powerbank, but that doesn't really work, because they have a few unfortunate habits:
- They often are too bulky
- There is no simple way to turn them on or off without unplugging things
- Most of them CUT POWER OUTPUT FOR A SECOND WHEN YOU PLUG THEM TO CHARGE
The last one is a killer. You can't use a laptop that crashes every time you plug it.
So, I got a "Raspberry Pi UPS" thing which is powered by standard 18650 batteries. They are available everywhere and are very cheap, which is good.

In this image you can see the whole "power system"
The green and white cylinders are the 18650 batteries. They are inserted in a black case on top of a circuit board. That is the "UPS" system,
It can power multiple things via 2 USB-A ports and a USB-C port.
This particular one has a button to turn it on and off that is exposed in the back of the case as well as a micro USB port to charge, which are exposed on the back of the case.

However ... the button only turns off one of the power outputs. If you look at the BOTTOM of the "UPS" you can see a pair of red and black cables. Those are connected to freaking pogo pins at the bottom of the UPS and go to a couple of pins in the Radza Zero to power it.
This sucks a little because I had to use that ad-hoc connector instead of a simple USB cable and it means the "UPS" has to be fairly separated from the bottom of the case (7mm!), but hey, it works.
There are also a couple other wires, orange and blue. Those are connected to a cheap voltage-measuring thing with LEDs. It costs about 50 cents and ... is not great.
OTOH I glued it to the INSIDE of the case and I think it looks awesome.
It can stay turned on all the time because it uses so little power it would have to be turned on for a month to drain the battery.
The screen gets power from a USB hub connected to the Radxa Zero, so I don't need to figure out how to power it from here.
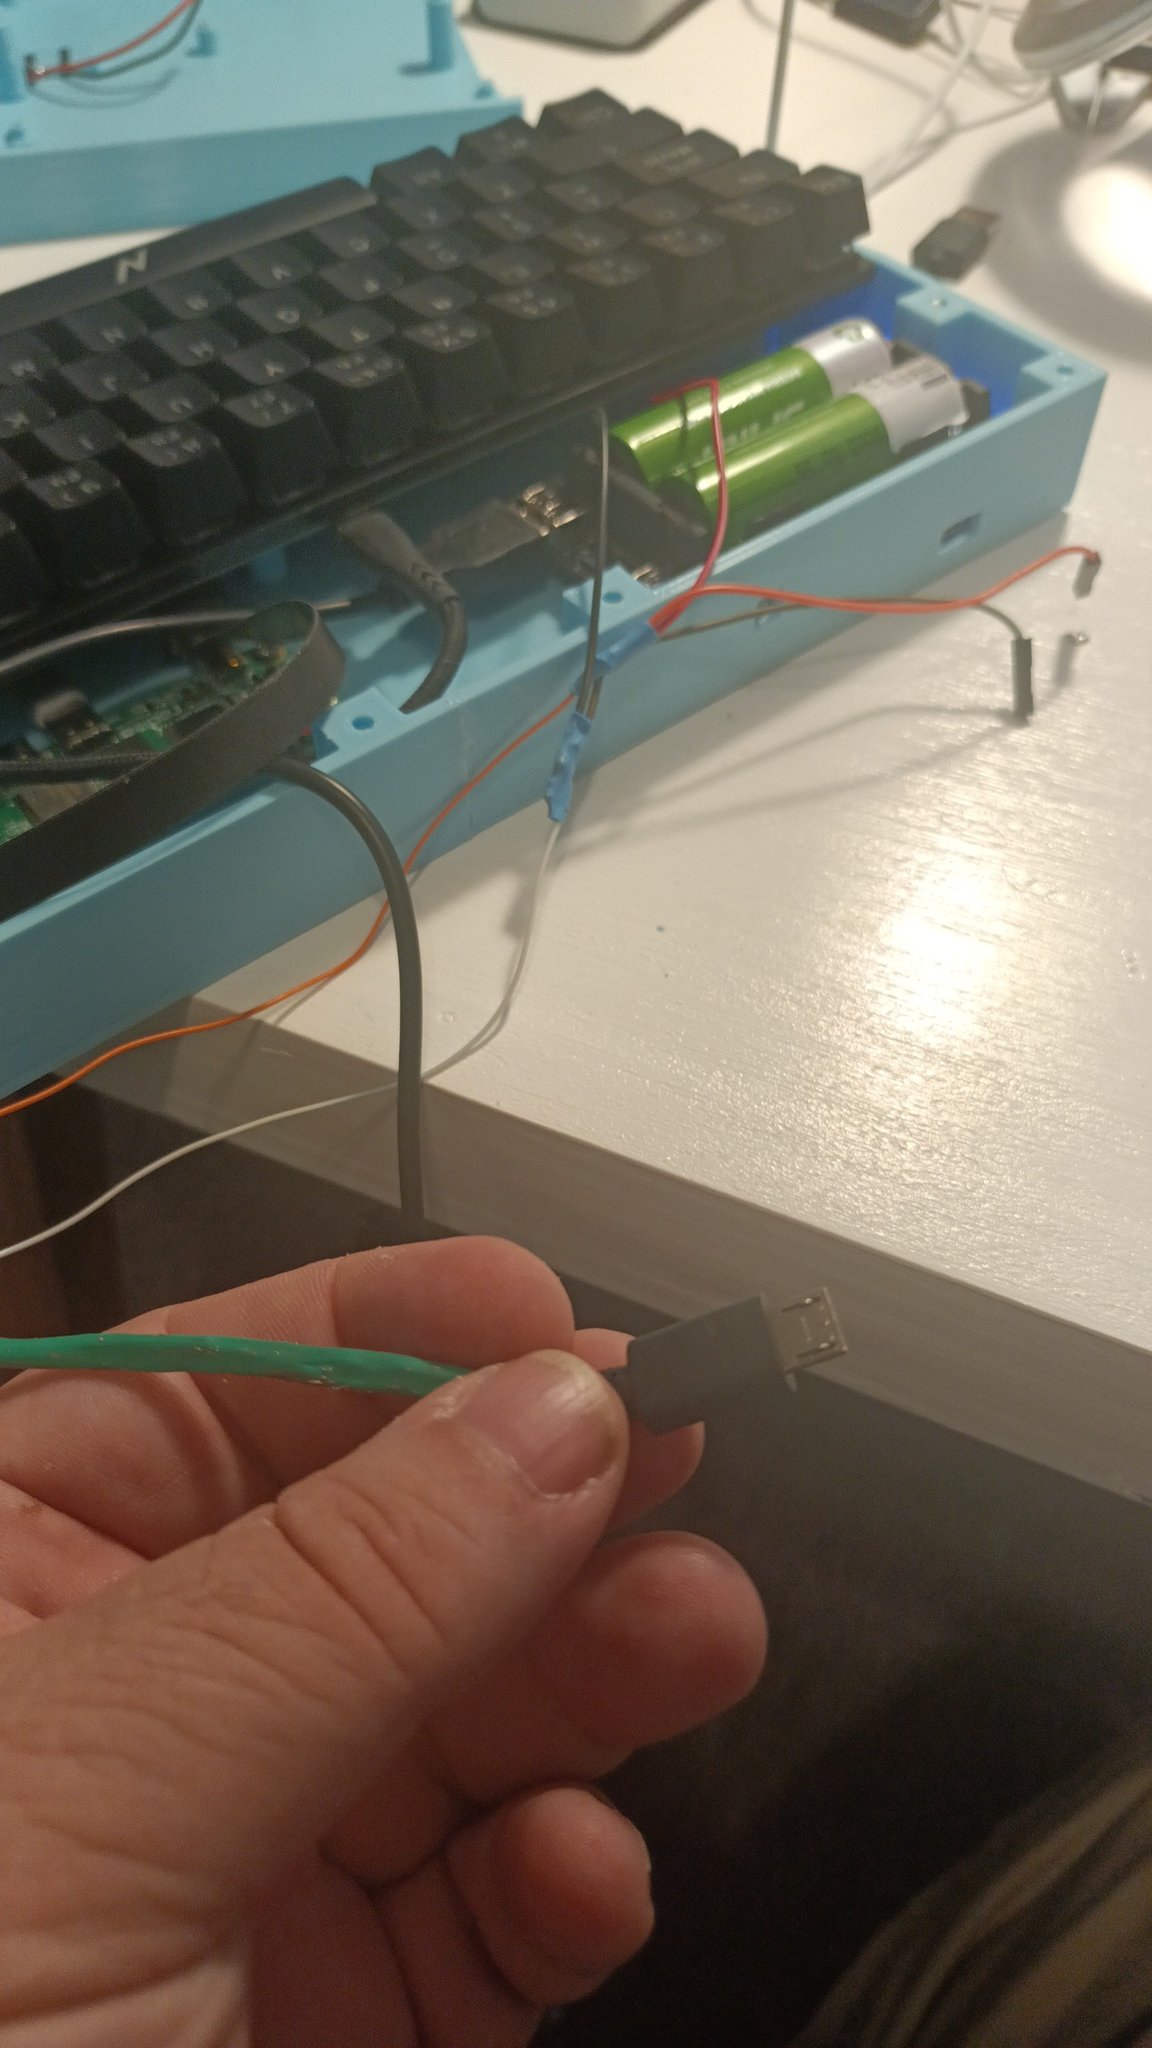
UPDATE: Turns out the screen was drawing too much power, so when the system got loaded or another peripheral was added it got unstable and things turned on and off as it tried to keep up. I just spliced a micro-USB power-only cable into the power from the pogo pins and it works just fine, except for the ugly, ugly cabling.
I/O
The Radxa Zero has a pretty limited port selection, being that small.
- HDMI which is connected to the included screen.
- 1 USB 2.0 OTG port (unused for now)
- 1 USB 3.0 port
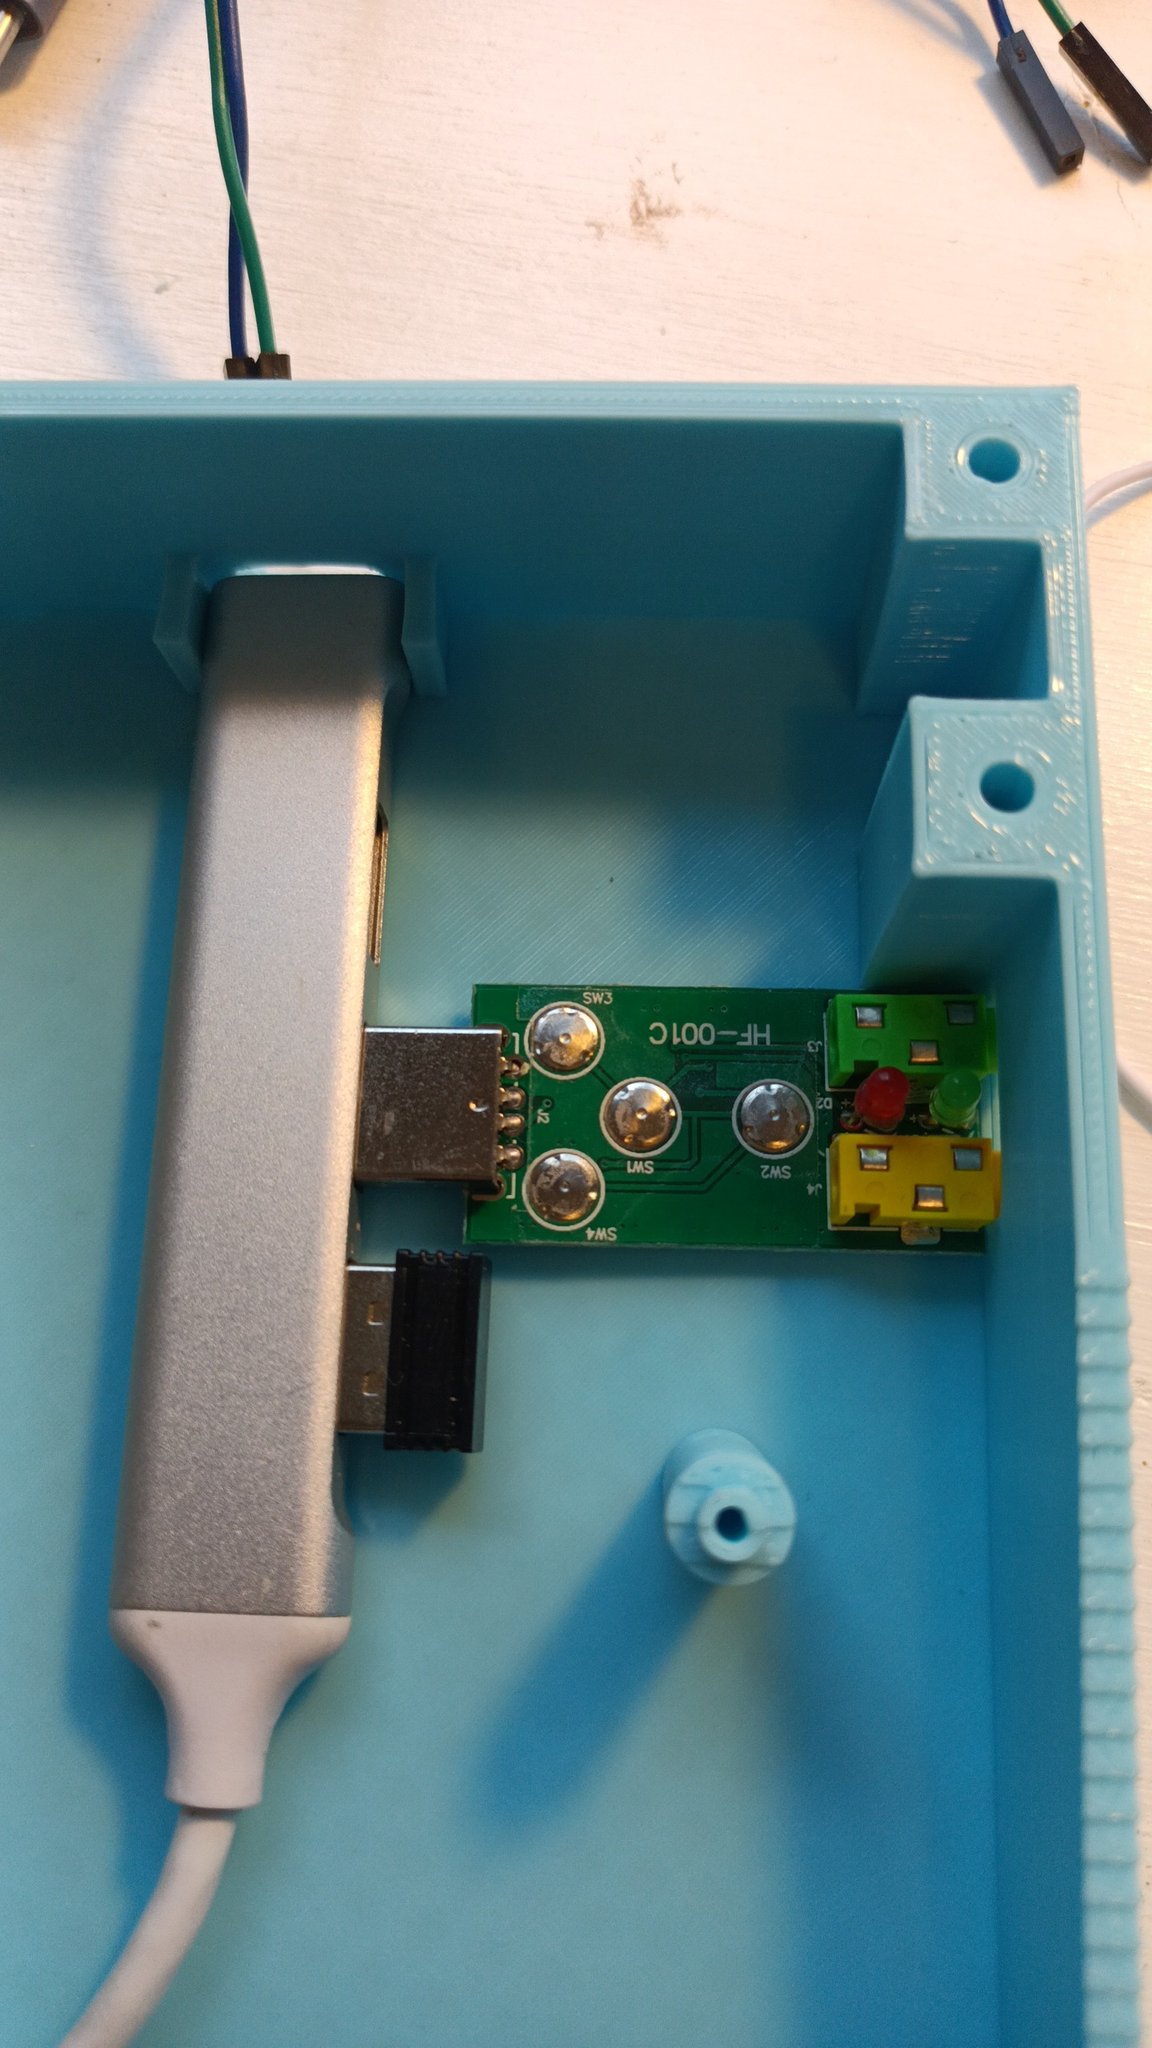
So I needed to make that single USB 3.0 port do more things. Which means I got a USB hub.
That's a aluminum hub (because why not) which has 4 ports, 3 on the side, and 1 on the tip.
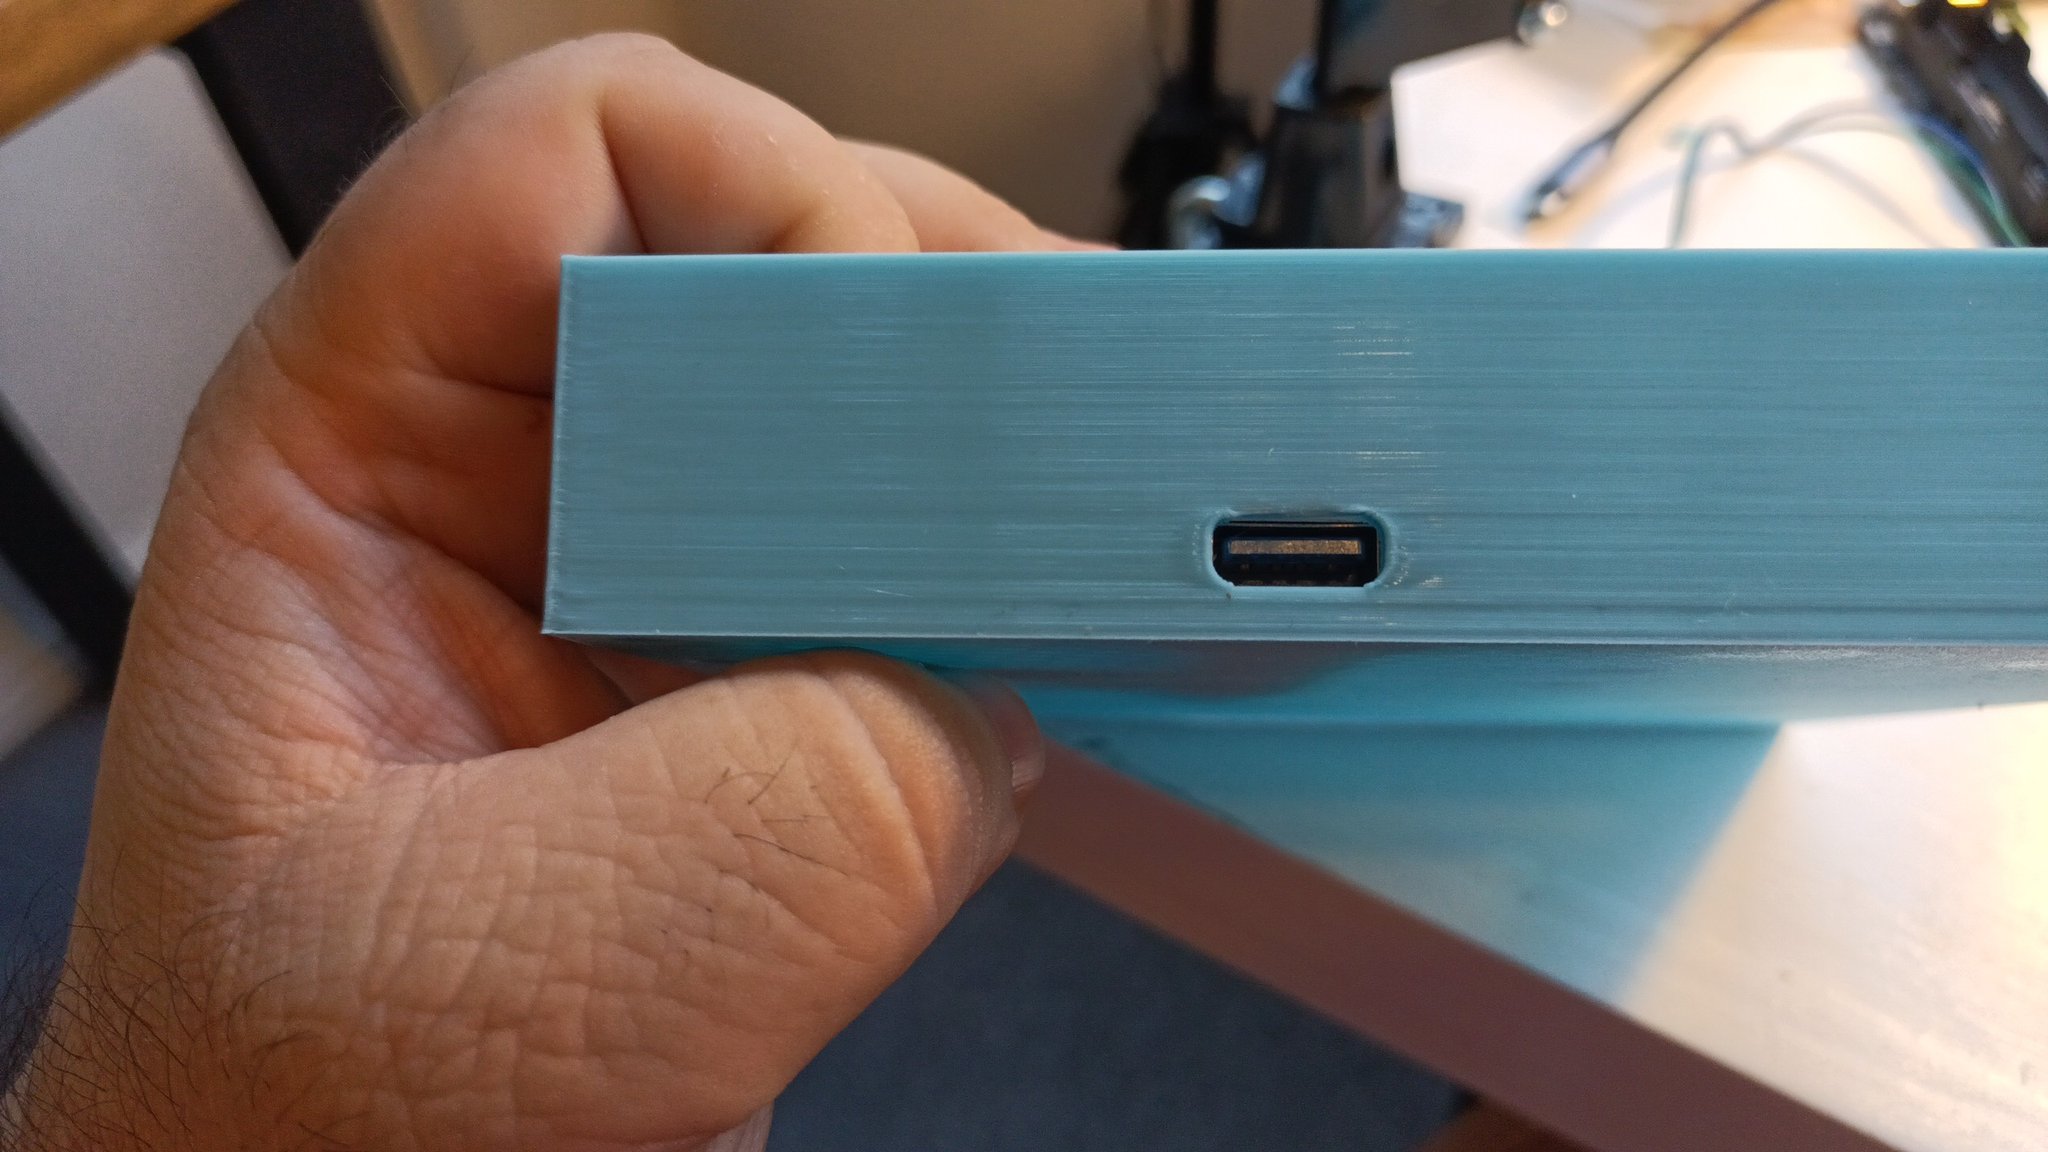
The port in the tip I exposed through a hole in the back of the case:
The ones on the right are used for:
- Plugging the keyboard
- Powering the screen
- A USB sound card
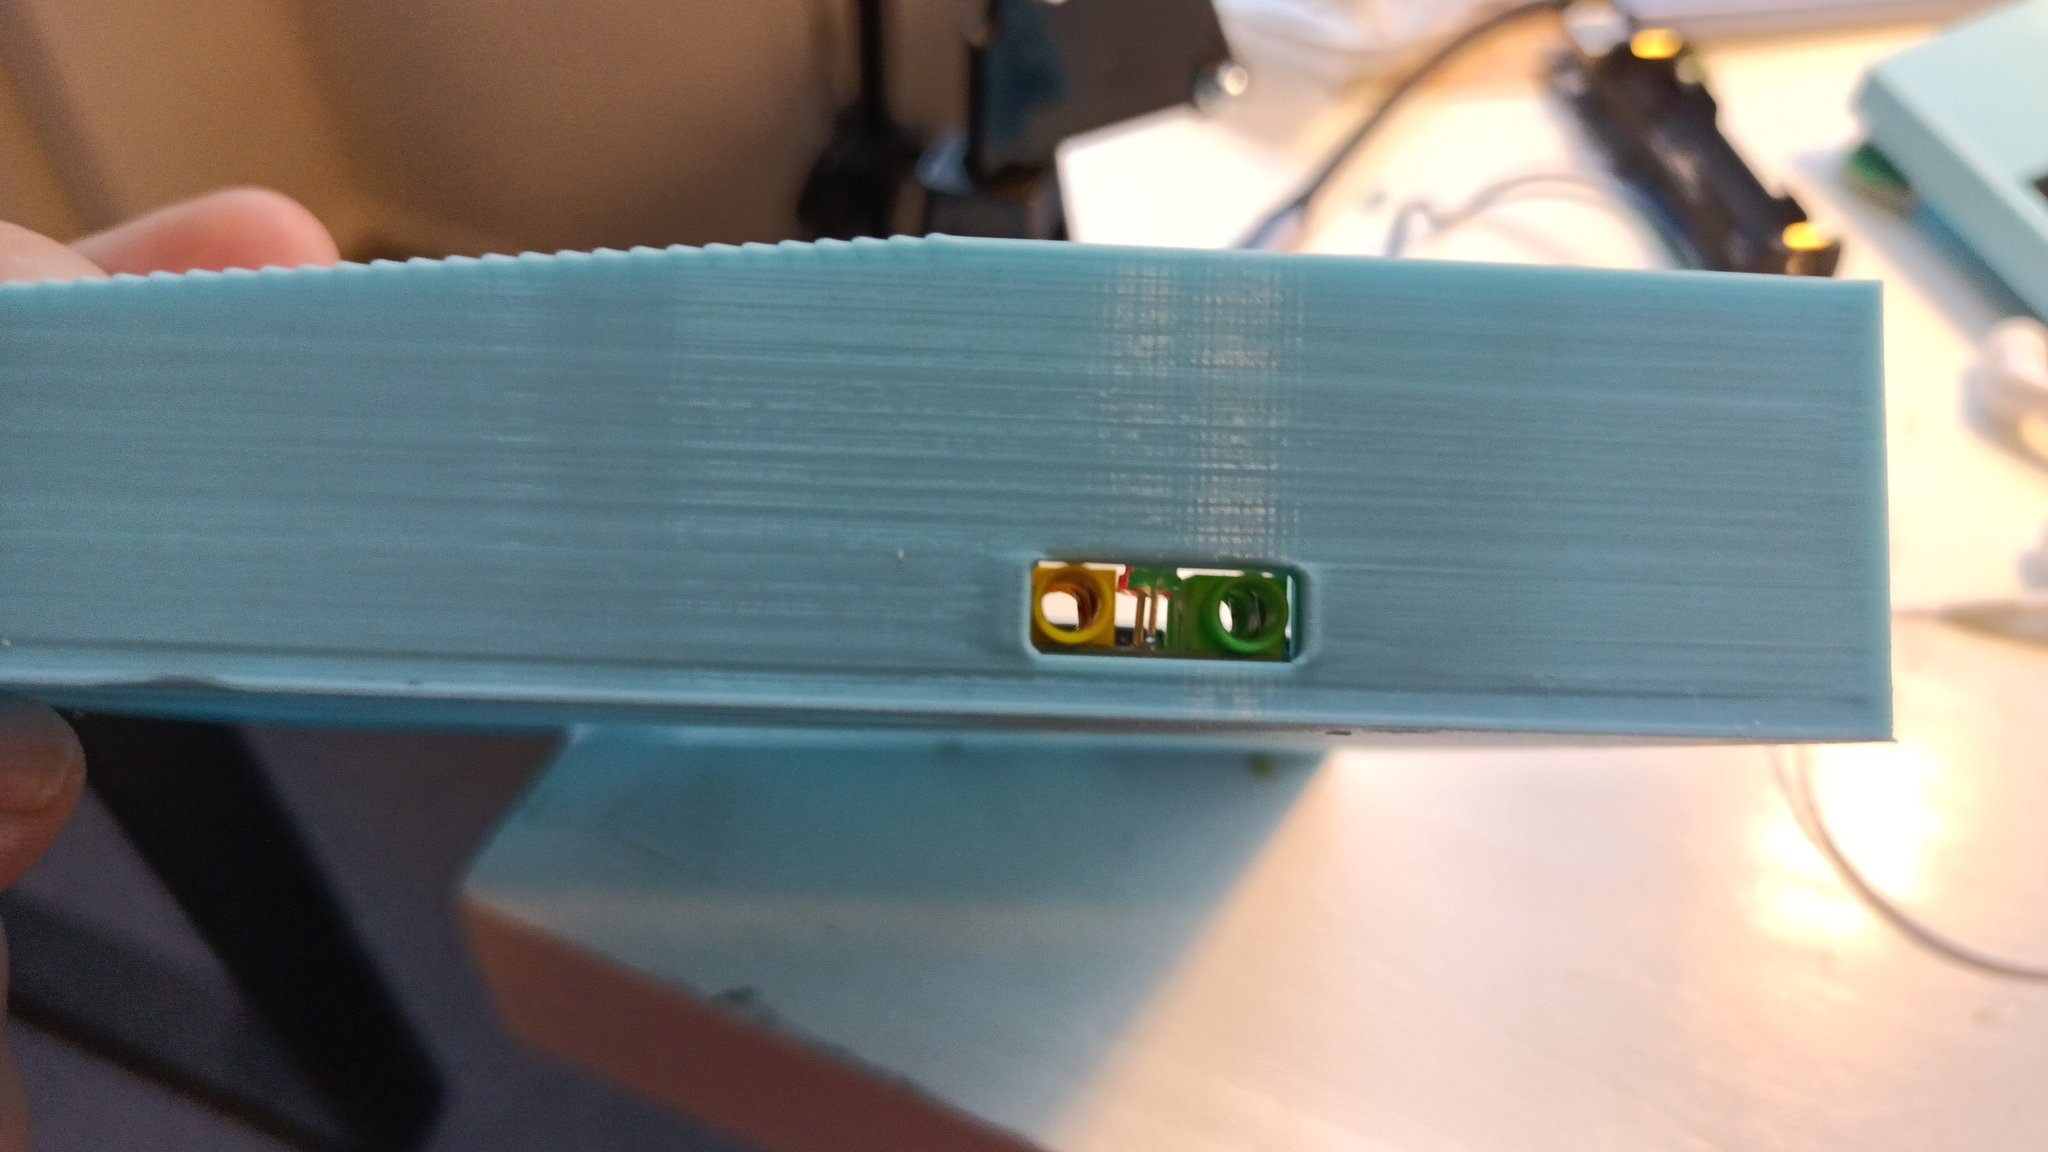
The audio jacks are exposed on the side of the case:
Update: Because of the changes in how the screen is powered now there is another free USB port which means I may be able to provide an exposed Ethernet port!
Screen
This is a generic 1920x480 screen. I think they are made for car systems, so they are bright and fairly affordable, you should have no problem finding one in your favourite chinese supplier.
If you can afford a touch version maybe that would be nicer, but this one is not touch, because I expect the main interface to be keyboard based.
This weird sort of screen may or may not work with your operating system, specially if you are using a not-so-well-known SBC like the Radxa Zero.
I had to build a custom kernel from github and that only on Ubuntu YMMV.
One unexpected issue was that the display offers mini-HDMI and the SBC has a micro-HDMI port.
Have you ever seen a mini-micro HDMI cable? Me neither (until recently) and if you try to use regular HDMI cables and adapters ... the end result is something impossible to fit into a reasonable case.
Solution: flat, modular HDMI cables!

You get the connectors you want, the cable length you want, you snap them together and voilá! Small, flexible cable with the connectors you need!
Did I mention that these cables took 3 months to arrive? And I could not move forward with the build until they did? Because they did take 3 months to arrive. So get a bunch at once.
Case
With all the components above you can connect everything and have a working ... thing. But you can't put it in your lap, so it's not a laptop.
To combine them all you need a case. And in 2023, as a simple person with no mechanical talents that means 3d printing.
BUT, I also lack any knowledge of 3D design software.
BUT, I am a programmer. So when I found I could write 3D models as Python programs I knew what to do: use CadQuery
Then came a months-long period of figuring out how to create the case and how to print it and so on, but the end result is two pieces:

The bottom piece is basically a box with pegs and holes where all the components are mounted.

The top piece is where the screen goes.
Both of them have holes and stands so they can be screwed to each other.
Because they are too large, they are printed in halfs and then assembled.
With a larger 3D printer I could print the base as a solid piece, however, the top half needs to be split in half so the screen can slide in place.
All this is generated by a couple of Python scripts available in my personal code server.
It's not all the way there yet, but the goal is to create a software package that lets you (yes, you) set parameters and make this work with your random collection of misfit computer hardware.
So, no screen? Print a lid, expose the HDMI port!
Have a Raspberry Pi 4 instead of a Radxa Zero? Sure, adjust a few things and make it work.
Got a random keyboard with 14 mount points in random places? Sure, measure them and slap it in place.
But again: not there yet.
Performance
What can it do?
- Run a web browser (tried Falkon)
- Watch a Youtube video (or even two!)
- Run a lightweight graphical desktop
- Run terminal apps like a champ
- Edit text and write code
So, it's good enough for light usage, which is what I am aiming for.
Battery life is between 3 and 5 hours depending on load.
Software
This is running Ubuntu Focal with a custom kernel and a patched dwm
The terminal of choice is alacritty because while it uses a lot more RAM than st it runs a bazillion times faster.
To mux the terminal (alacritty has no tabs) I use zellij an awesome and friendly alternative to tmux/screen/etc.
To browse the web I would love to use qutebrowser because of its awesome keyboard support that makes the mouse an afterthought. Buuuut it's really really broken in this Ubuntu, so Falkon it is.
Do not try to get fancy with power management. Things like upowerd immediately throttle the CPUs to 100MHz making it impossible to do anything.
Other than that, just the usual Ubuntu underneath it all.
Problems (TODO)
- Airflow is inexistent, so it overheats
- When it overheats it starts turning off and on the USB port which makes everything work badly.
- The keyboard is too high from the table, so that needs tweaking.
- Because of the battery solution it's kinda thick at the back
- The power button is really hard to click
- The battery gauge sucks
- Needs no-slip pads
- Has no support for a pointer (other than plugging a mouse) so an integrated trackball or thinkpad-style nub would be nice.
Comments
This blog has no comments, but feel free to discuss it in this reddit post
