PyQt by Example detour: QGraphicsScene and friends session1
Introduction
This is not really part of my PyQt by Example series [*] but since it's a totally unrelated topic that would be impossible to connect to it, but is still a PyQt tutorial and follows the same concept... whatever, here it is.
In this tutorial I will explain QGraphicsScene (QGS for short) and its related classes. What are they for, you may ask? Well, the answer is: they are for cool stuff.
You don't need QGS for CRUD. You don't need QGS for office applications. You don't need QGS for boring stuff. Just for fun stuff, like games or anything that needs fancy graphics and a non-conventional UI.
How does it work
You can think of a QGraphicsScene as a stage, filled with actors. The actors are called QGraphicsItems and they can do things in the stage.
An item can be of different kinds:
A text
A shape (like a circle or a polygon)
A picture
A widget (yes, any Qt widget works!)
Then, you can have one or more "cameras" looking at the stage. That's a QGraphicsView.
Keep this in mind, because it's very important:
One QGraphicsScene can contain any number of QGraphicsItems.
Any number of QGraphicsViews can be linked to a QGraphicsScene
Whatever the items do in one scene, all views will show the same thing.
So, having said that, let's start doing code.
I don't believe in many things, but I do believe one thing: It's almost never a good idea to do your PyQt UI without using designer.
In this specific case, our first example application has the silliest UI you can think of: an empty window with a QGraphicsView in it. Still, I did it using designer, and here is the file, which is as trivial as it sounds: window.ui
As usual, I will start with my basic template for a PyQt app, and add a little bit of code in the main widget's __init__ method so it does something interesting ( don't worry much about what populate and animate do, yet):
# -*- coding: utf-8 -*-
"""The user interface for our app"""

import os,sys,time

# Import Qt modules
from PyQt4 import QtCore,QtGui, QtOpenGL

# Import the compiled UI module
from ui_clock import Ui_Form

from random import randint, shuffle

# Create a class for our main window
class Main(QtGui.QWidget):
    def __init__(self):
        QtGui.QWidget.__init__(self)

        # This is always the same
        self.ui=Ui_Form()
        self.ui.setupUi(self)

        # From here until the end of this method is
        # the only interesting part!

        # Since the UI is a QGraphicsView, I create a Scene
        # so it has something to show
        self.scene=QtGui.QGraphicsScene()
        self.ui.view.setScene(self.scene)


        self.scene.setSceneRect(0,0,600,400)

        # This makes the view OpenGL-accelerated. Usually makes
        # things much faster, but it *is* optional.

        self.ui.view.setViewport(QtOpenGL.QGLWidget())

        # populate fills the scene with interesting stuff.

        self.populate()

        # Make it bigger
        self.setWindowState(QtCore.Qt.WindowMaximized)

        # Well... it's going to have an animation, ok?

        # So, I set a timer to 1 second
        self.animator=QtCore.QTimer()

        # And when it triggers, it calls the animate method
        self.animator.timeout.connect(self.animate)

        # And I animate it once manually.
        self.animate()

def main():
    # Again, this is boilerplate, it's going to be the same on
    # almost every app you write
    app = QtGui.QApplication(sys.argv)
    window=Main()
    window.show()


    # It's exec_ because exec is a reserved word in Python
    sys.exit(app.exec_())


if __name__ == "__main__":
    main()
Here's what that code does, in a nutshell:
Setup a QGraphicsScene
Connect our view to it
Fill the scene with something (populate)
Make the items do something (animate)
Now, let's see the missing pieces. First, populate:
def populate(self):
    self.digits=[]
    self.animations=[]

    # This is just a nice font, use any font you like, or none
    font=QtGui.QFont('White Rabbit')
    font.setPointSize(120)


    # Create three ":" and place them in our scene
    self.dot1=QtGui.QGraphicsTextItem(':')
    self.dot1.setFont(font)
    self.dot1.setPos(140,0)
    self.scene.addItem(self.dot1)
    self.dot2=QtGui.QGraphicsTextItem(':')
    self.dot2.setFont(font)
    self.dot2.setPos(410,0)
    self.scene.addItem(self.dot2)

    # Create 6 sets of 0-9 digits
    for i in range(60):
        l = QtGui.QGraphicsTextItem(str(i%10))
        l.setFont(font)
        # The zvalue is what controls what appears "on top" of what.
        # Send them to "the bottom" of the scene.
        l.setZValue(-100)

        # Place them anywhere
        l.setPos(randint(0,500),randint(150,300))

        # Make them semi-transparent
        l.setOpacity(.3)

        # Put them in the scene
        self.scene.addItem(l)

        # Keep a reference for internal purposes
        self.digits.append(l)
As you can see, populating a scene is as simple as creating whatever items you want to be in the scene, put them in their positions, set their attributes any way you want, and adding them to the scene itself.
Now, the "tricky" one, animate:
def animate(self):

    # Just a list with 60 positions
    self.animations=range(0,60)


    # This is the only "hard" part
    # Given an item, and where you want it to be
    # it moves it there, smoothly, in one second.
    def animate_to(t,item,x,y,angle):
        # The QGraphicsItemAnimation class is used to
        # animate an item in specific ways
        animation=QtGui.QGraphicsItemAnimation()

        # You create a timeline (in this case, it is 1 second long
        timeline=QtCore.QTimeLine(1000)

        # And it has 100 steps
        timeline.setFrameRange(0,100)

        # I want that, at time t, the item be at point x,y
        animation.setPosAt(t,QtCore.QPointF(x,y))

        # And it should be rotated at angle "angle"
        animation.setRotationAt(t,angle)

        # It should animate this specific item
        animation.setItem(item)

        # And the whole animation is this long, and has
        # this many steps as I set in timeline.
        animation.setTimeLine(timeline)

        # Here is the animation, use it.
        return animation

    # Ok, I confess it, this part is a mess, but... a little
    # mistery is good for you. Read this carefully, and tell
    # me if you can do it better. Or try to something nicer!

    offsets=range(6)
    shuffle(offsets)

    # Some items, animate with purpose
    h1,h2=map(int,'%02d'%time.localtime().tm_hour)
    h1+=offsets[0]*10
    h2+=offsets[1]*10
    self.animations[h1]=animate_to(0.2,self.digits[h1],-40,0,0)
    self.animations[h2]=animate_to(0.2,self.digits[h2],50,0,0)

    m1,m2=map(int,'%02d'%time.localtime().tm_min)
    m1+=offsets[2]*10
    m2+=offsets[3]*10
    self.animations[m1]=animate_to(0.2,self.digits[m1],230,0,0)
    self.animations[m2]=animate_to(0.2,self.digits[m2],320,0,0)

    s1,s2=map(int,'%02d'%time.localtime().tm_sec)
    s1+=offsets[4]*10
    s2+=offsets[5]*10
    self.animations[s1]=animate_to(0.2,self.digits[s1],500,0,0)
    self.animations[s2]=animate_to(0.2,self.digits[s2],590,0,0)

    # Other items, animate randomly
    for i in range(60):
        l = self.digits[i]
        if i in [h1,h2,m1,m2,s1,s2]:
            l.setOpacity(1)
            continue
        l.setOpacity(.3)
        self.animations[i]=animate_to(1,l,randint(0,500),randint(0,300),randint(0,0))

    [ animation.timeLine().start() for animation in self.animations ]


self.animator.start(1000)Sadly I can't show you the end result in a video, it's pretty hard to capture. But here's a teaser (95% of the fun is the animation, so try it yourself ;-):
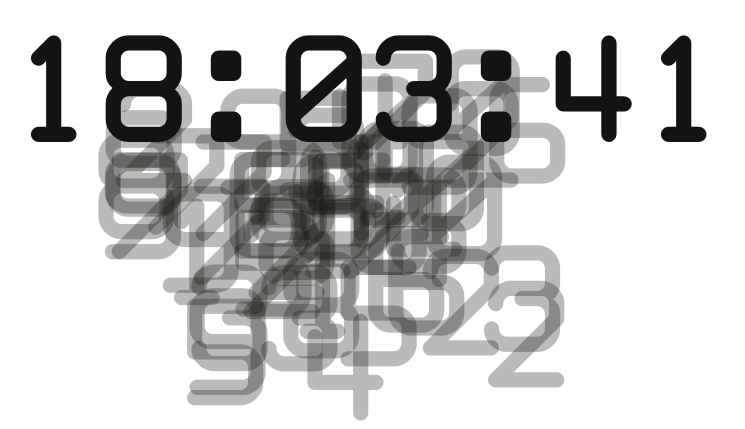
Coming in session 2 of this detour: interaction and more
I agree with this blog, this comment is very interesting and I want to visit it more frequently.
I've downloaded the source for graphicsscene (this is my main interest now),
and it doesn't work
from ui_clock import Ui_Formwhat's Ui_Form? or ui_clock?I didn't find anything as these,I've downloaded all sources in a zip file.Am I missing something?
You need to generate it first: "pyuic clock.ui > ui_clock.py"